nbn™ has finally arrived! In preparation for this I decided to purchase a TP-Link WD9977 VDSL modem/router to place in bridge mode and use with my existing Billion 7800VDOX router — in this post I’m going to share the steps needed to setup the WD9977 in bridge mode and use my existing router for all other network tasks:
- Disable wireless network on TP-Link WD9977
- Disable DHCP server on WD9977
- Configure DSL modulation settings on WD9977
- Place WD9977 into bridge mode
- Configure WAN port on Billion 7800VDOX
Step 1 – Configure TP-Link WD9977
- Factory reset the TP-Link WD9977, set a new password on the device once the factory reset has completed.
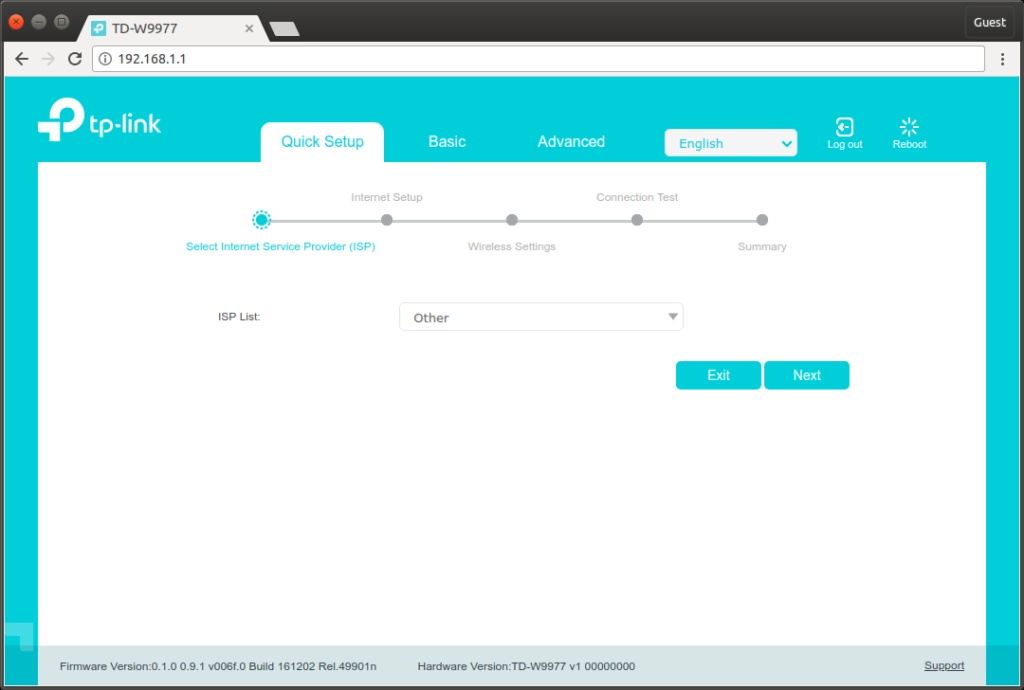
- Select the ‘Quick Setup’ tab, select ‘Other’ from the ‘ISP List’, click ‘Next’.
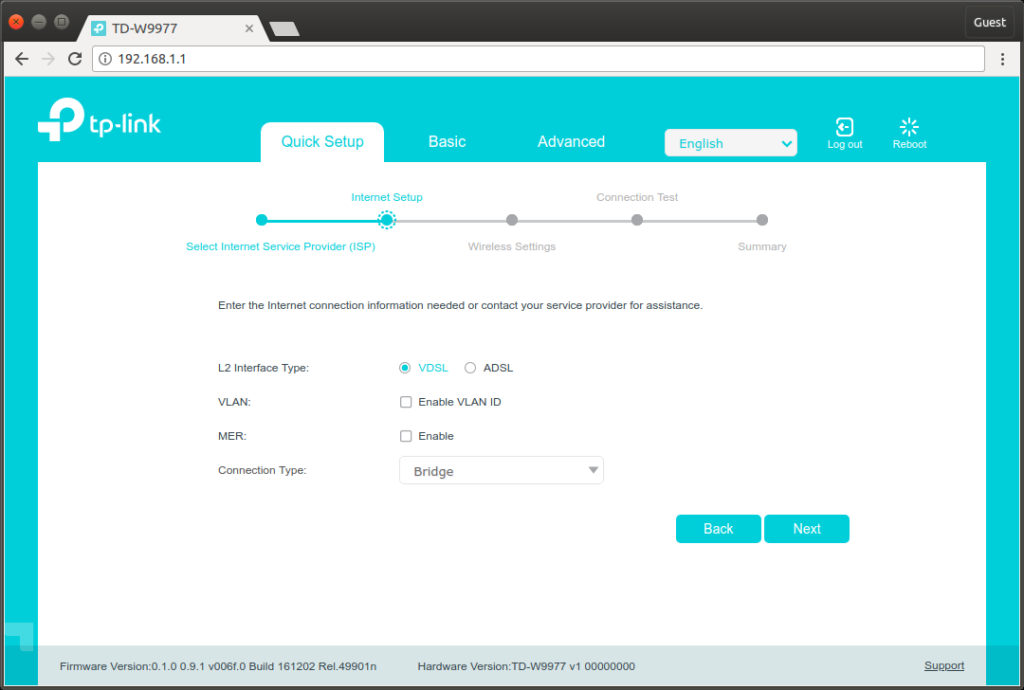
- Quick Setup > Internet Setup.
- L2 Interface Type: VDSL
- VLAN: Uncheck VLAN ID
- MER: Uncheck Enable
- Connection Type: Bridge
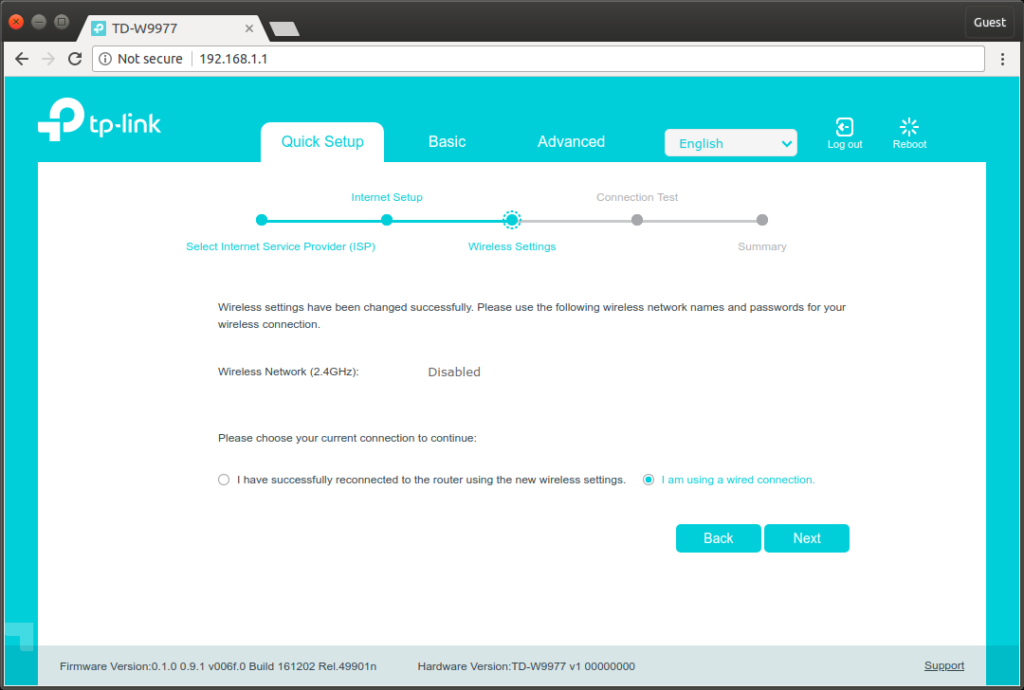
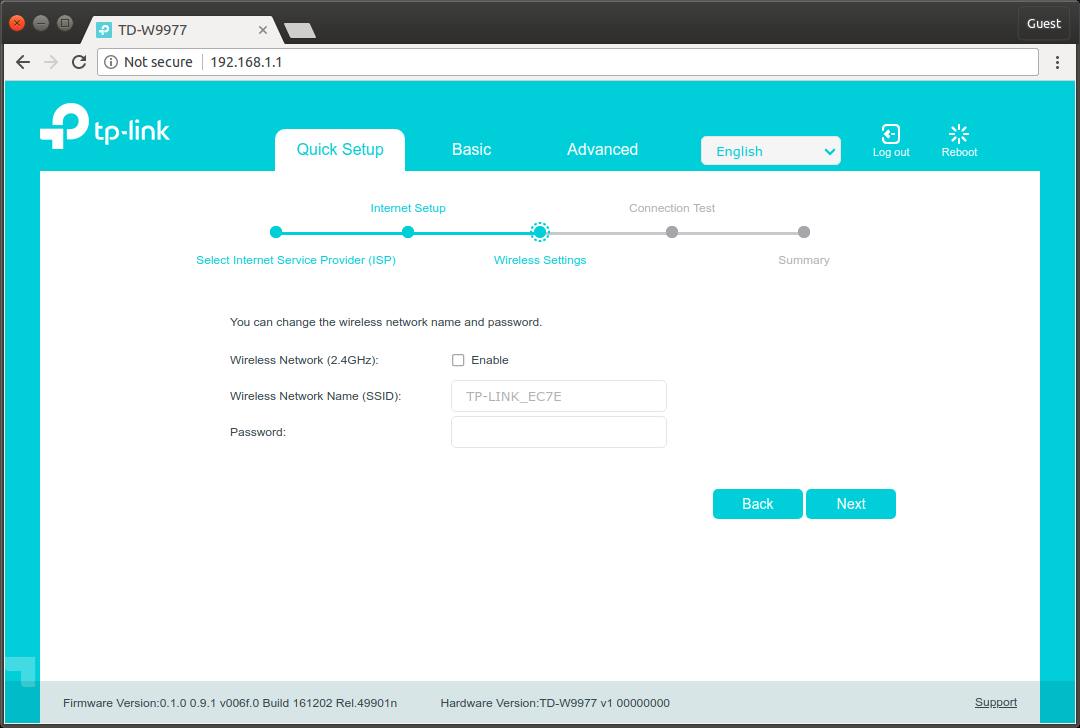
- Quick Setup > Wireless Settings.
- Wireless Network (2.4GHz): Uncheck Enable

- Select ‘I am using a wired connection.’, click ‘Next’ to continue.
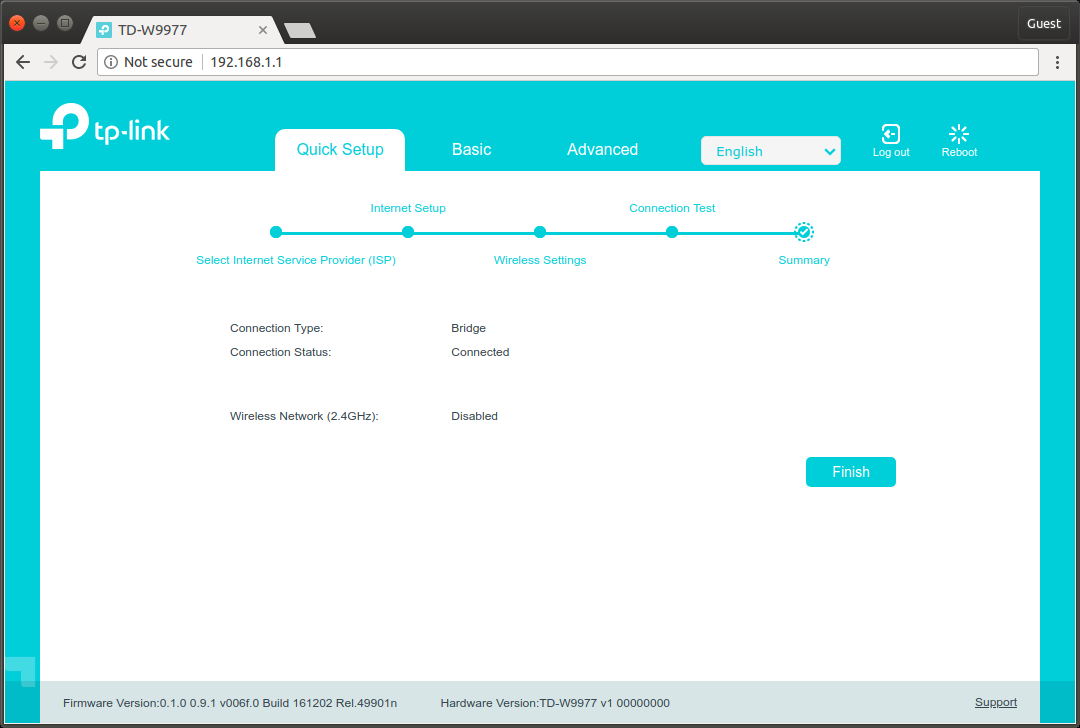
- Quick Setup > Summary. Click ‘Finish’ to continue.
- Connection Type: Bridge
- Connection Status: Connected
- Wireless Network (2.4GHz): Disabled

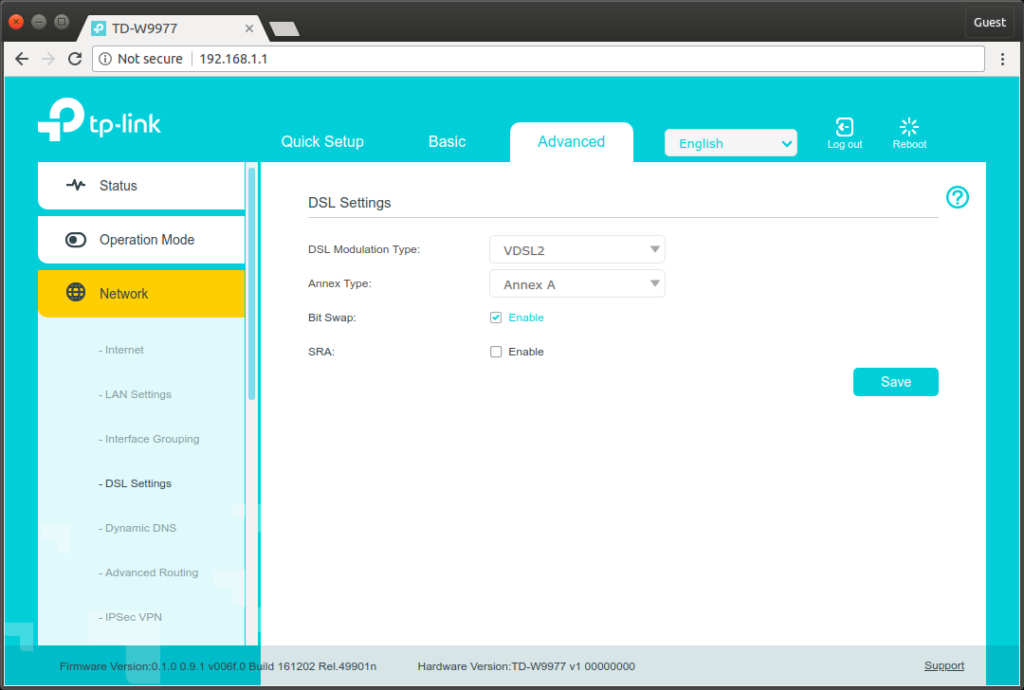
- Advanced > Network > DSL Settings.
- DSL Modulation Type: VDSL2
- Annex Type: Annex A
- Bit Swap: Check Enable
- SRA: Uncheck Enable
- Advanced > Network > LAN Settings.
- IP Address: e.g. 192.168.0.1
- Subnet Mask: e.g. 255.255.255.0
- DHCP: Uncheck Enable
Set the IP information accordingly, if you need to make future adjustments on the WD9977 you will need to connect to a spare LAN port on the WD9977 and create a static IP connection on the same network.
I use 192.168.0.x addresses on the WD9977 and 192.168.1.x addresses on the 7800VDOX.
- Advanced > System Tools > Time Settings.
Adjust your time settings accordingly, click ‘Save’. - Configuration completed on the WD9977, proceed to the Billion 7800VDOX.


Step 2 – Configure Billion 7800VDOX
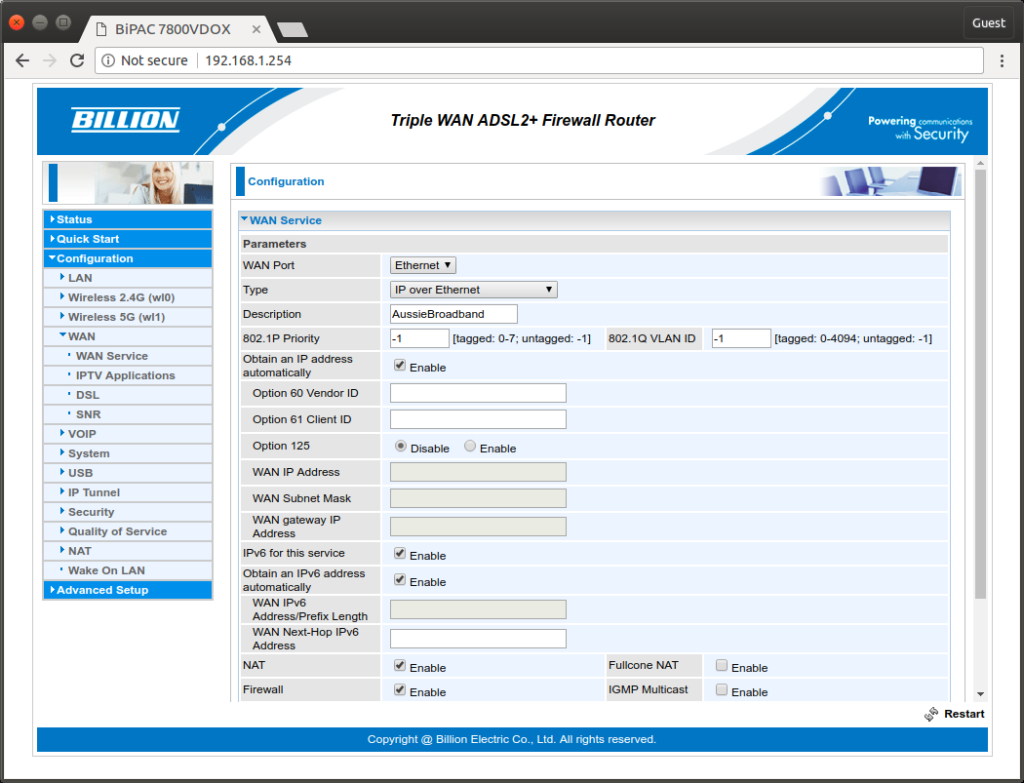
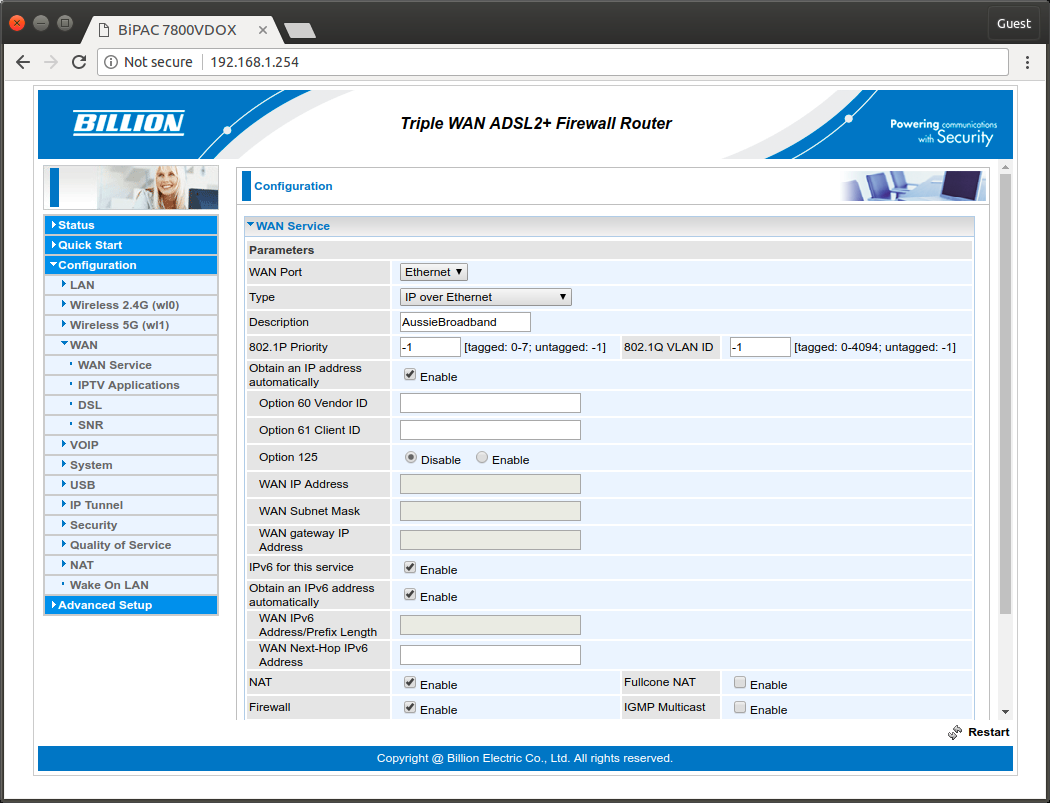
- Configuration > WAN > WAN Service.
- WAN Port: Ethernet
- Type: IP over Ethernet
- Description: e.g. Enter your ISP name
- Available Routed WAN interfaces: Ensure ipoe_eth0/eth0.1 is in this list.
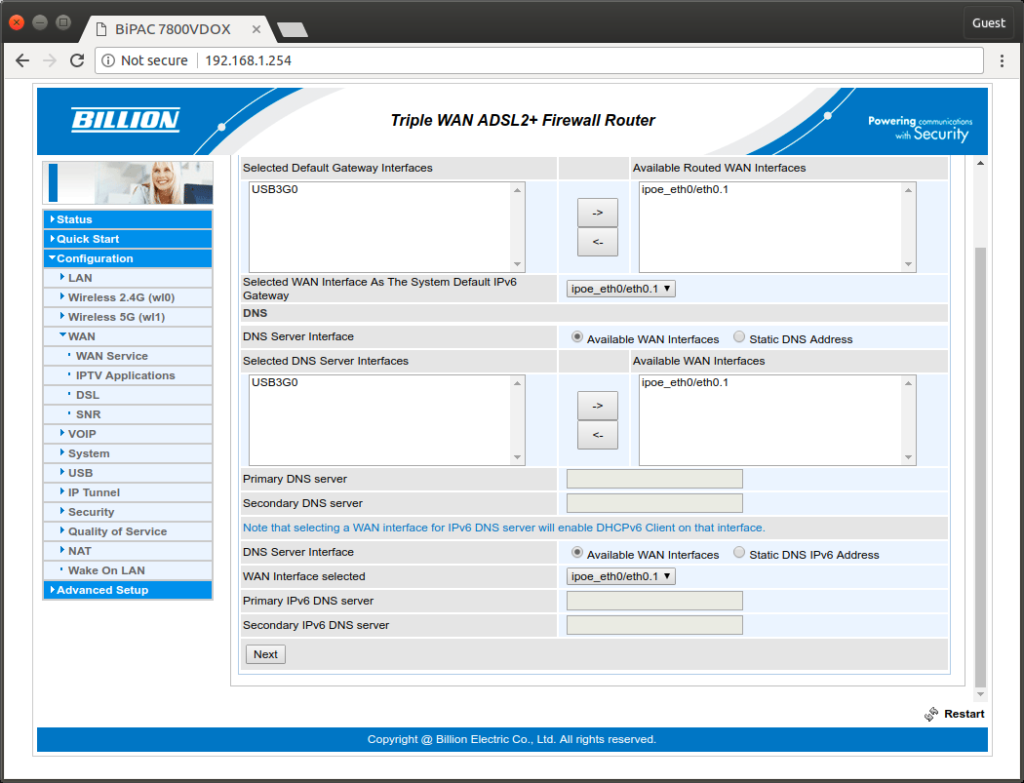
- Click ‘Next’, configuration completed on the 7800VDOX.

Please feel free to let me know if there is anything you’d like to know more about or any suggestions you may have! 🙂